Step 1 – Summary of Project
- This project was to tell people about myself and what are some things I like. This blog post is about how to set up a response to a project. I learned how to step up a brain write and a story bored. I also learned how important both are.
Step 2 – What is Good Presentation?
- What makes a good presentation is pictures of the things we are talking about instead of showing words.We want to be a good presenter because so that we can make people interested and make them bored.
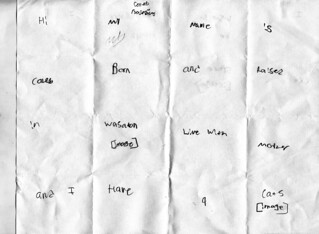
Step 3 – Brainwriting and Brainstorming Ideas
- What brain writing is its a thing when you wright down your plan so you can get the presentation done better and faster. Brainstorm is when you talk to someone to expand your plan. We do this so that we can be prepared for the future.
- EX

- EX
Step 4 – Creating the Storyboard
- What storyboarding is when you can do a layout of your project so you can know what thing come first, and it’s a safe place to keep your ideas. It also helps you plan out what can come first in your project and you can plan on what your project can/will look like.
- EXAMPLE:
Step 5 – Gathering and Citing Images
- Cite each image with proper MLA citation format.
- Alphabetize the citation list by username or the photographer’s name.
- What copyright is, is its a bad thing that can happen when you take peoples things on the internet without giving the person credit. Creative Commons is when you get images that don’t have copyright claim why I used the Creative Commons is because so that I don’t get sewed by the person who make that image. Citing your the image or media sources is important because if you need to go back to the website you can go back to it or if you need to show someone where you got the image from and who made that image. This is how you Cite a file. Photographer_name. Name_of Picture. N.d. Flickr.com. N.p., n.d. Web. 18 Sept. 2015.
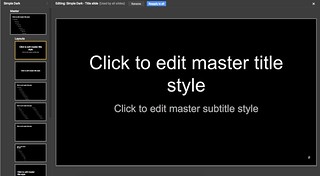
Step 6 – Creating the Master Slide
- The master slide is how you can changes all of the slides without going through the trouble of going through each individual slide. The reason why we use the master slide is because it is easer to change everything about the font or the color in the slide show.
- EXAMPLE:
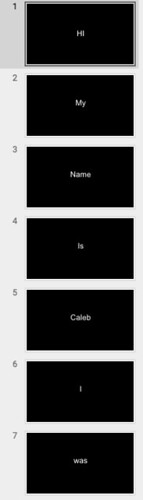
Step 7 – Building the Slide Show
- The reason why I use the text first and then used the images is because then people don’t have to read and look at something at the same time. The reason why this is helpful is because the people who you are presenting to can look at the image and not have to look and read at the same time.
EXAMPLE:
Step 8 – Sharing the Slide Show
- The reason why we used SlideShare.net is so that people can look at my Presentation from any computer and look to see if theres something that people don’t know how to do, they can look at mine to help themselves to try to figure out there problem. This can help yourself and other people.
- https://docs.google.com/presentation/d/1Tc0FIat2kyZ4JFh_H_E65DESNDGD6MgaFj6TQqBbxOc/edit#slide=id.g4251020138_0_55
Step 9 – Preparing to Present/Pitch
- How I prepared for my presentation way by brainstorming and brain writing to help me what slides and what information would go first. It also helped me what to even put onto my presentation.
Step 10 – What I Learned
- What I learned through this presentation was how to get ideas to make a presentation. I also learned how to do a brain wright and what the differences was between a brain wright and a brainstorm. I also learned how important it is to have a brain right and a brainstorm before making a presentation. I also learned that using visuals instead of just words makes people remember the presentation, and how using pictures will make your presentation less boring and get people’s attention better.